
Custom Connector CRM
Integration Guide
This guide walks through connecting the Acefone Dialer to an in-house or custom-built CRM using the Custom Connector integration. Follow the steps below to authorize the connection and map campaign call events to your CRM's API.
Table of Contents
Getting Started
-
Log in to your Acefone account.
-
Under the left option tab, select Integrations.
-
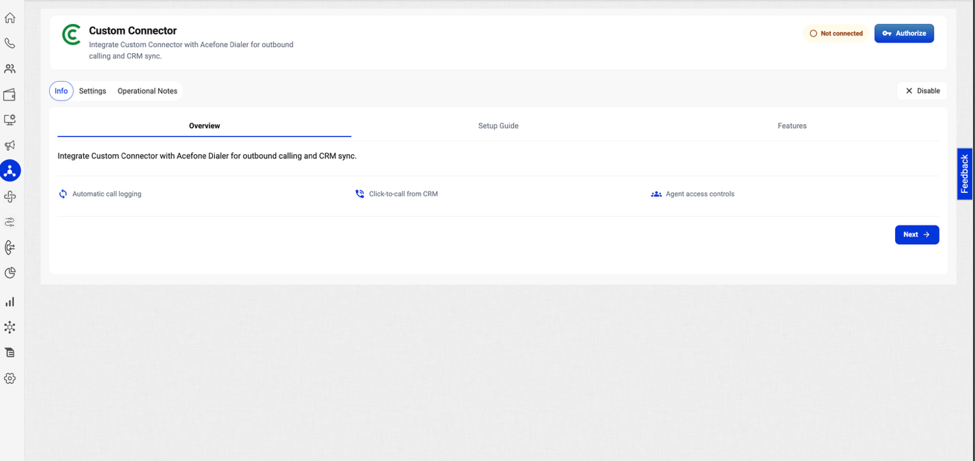
Click Enable under the Custom Connector integration to activate it.
-
Click More Details to open the integration's configuration steps.
-
Click the Settings tab to begin configuration.
-
Click Configure under Custom Connector Account Authorization.
Authorizing the Connector
-
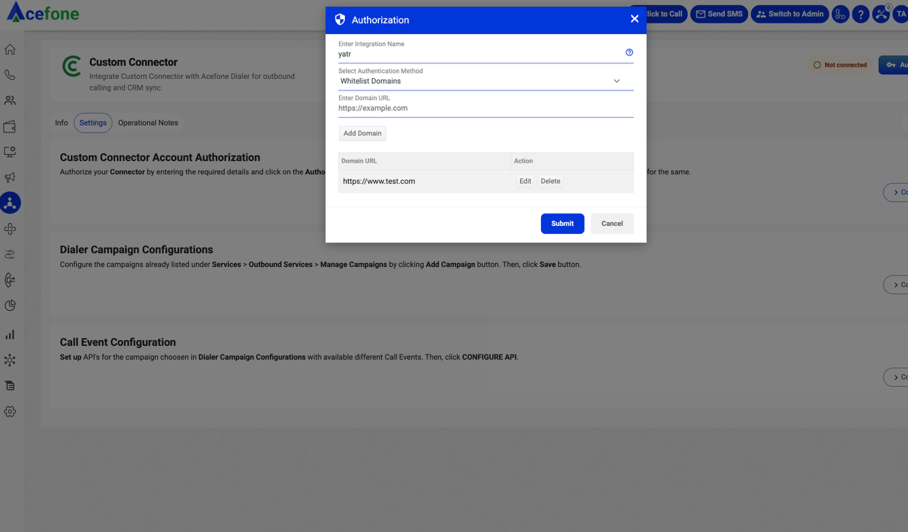
Enter an Integration Name and choose an Authentication Method. Acefone supports two authentication methods for the Custom Connector:
- API Key
- OAuth
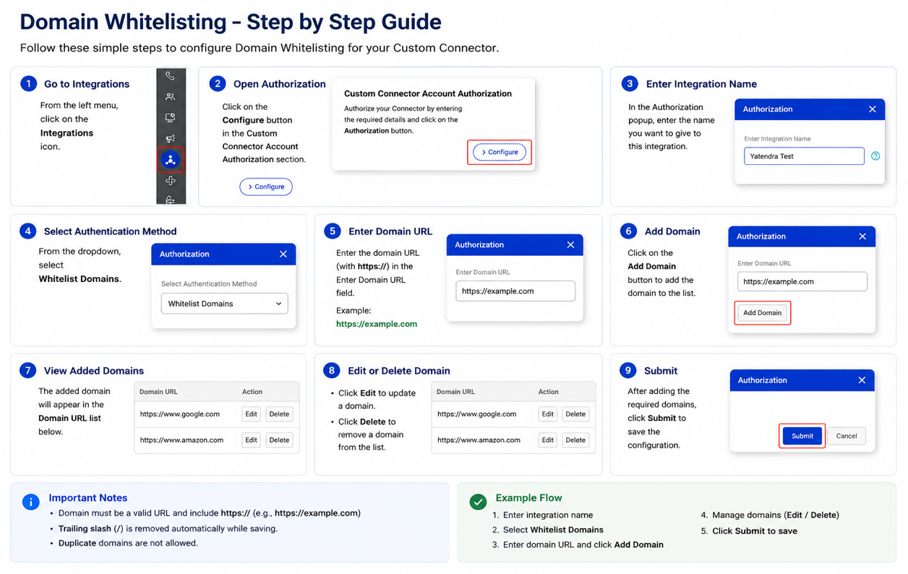
Whitelisting Domain is also a necessary step.
Option A: Authenticating with an API Key
-
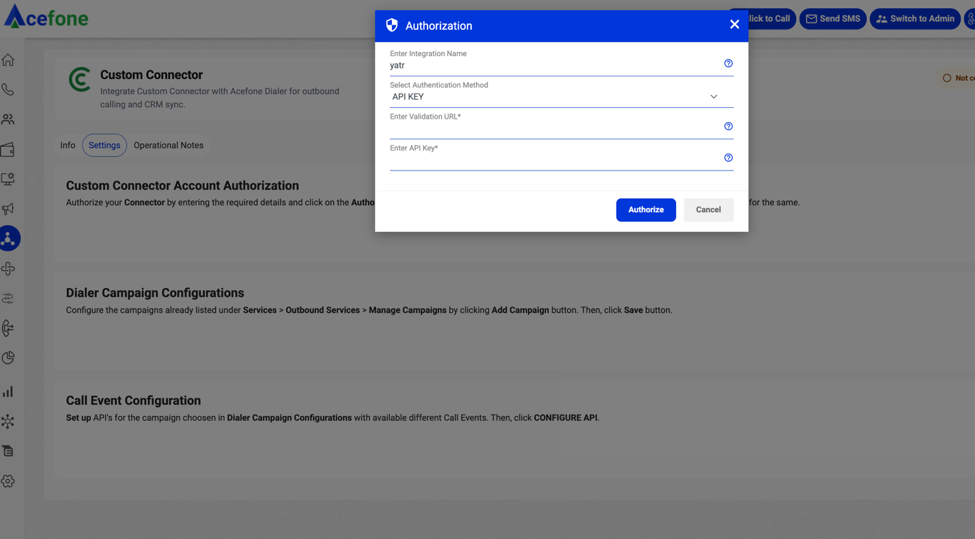
Select API KEY as the authentication method from the drop-down.
-
Enter the Validation URL and API Key, then click Authorize.
Note: You can find these credentials on the Settings or Configuration page of your CRM.
-
Authorization is complete. The Connector CRM authorization now shows as successful.
Option B: Authenticating with OAuth
-
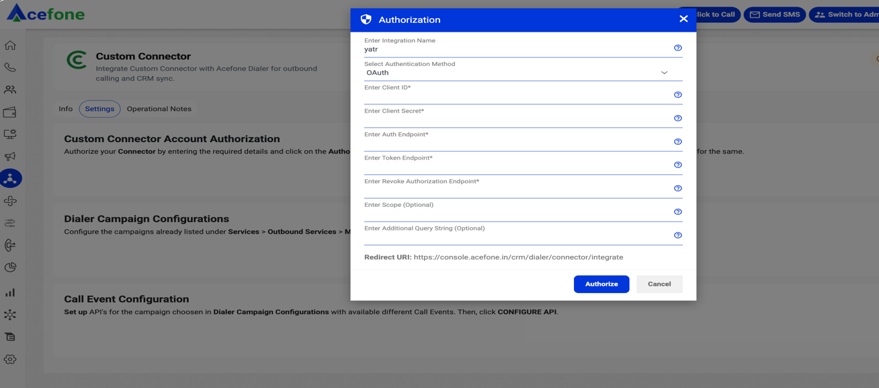
Select OAuth as the authentication method from the drop-down.
-
Enter the following details, then click Authorize:
Field Description Client ID The unique identifier of the application. Client Secret The unique password of the application. Auth Endpoint The URL where the resource owner authorizes the OAuth client. Token Endpoint The URL used to exchange an authorization grant for an access token. Revoke Authorization Endpoint The URL used to revoke tokens issued to clients. Scope (optional) Defines which operations the API is permitted to perform on the data. Note: These credentials are available to the client through the API Console. See Acefone's Custom Connector API documentation for details on the authorization token format.
-
Enter your credentials and click Sign In to finish the integration.
-
The Custom Dialer Connector integration is now complete.
Mapping Campaigns to CRM Events
-
Click Configure under Dialer Campaign Configurations to set up the Connector CRM campaign.
-
Choose the desired campaign from the drop-down, then click Configure Call Hangup Event.
Note: Keep the following in mind when choosing a dialer campaign, or you may run into errors:
- The dialer campaign should not contain multiple lead lists.
- The same lead list should be used for outbound, manual, and inbound calls within the campaign.
- The campaign's Agent Wise Lead List feature should be disabled.
-
Enter the API URL and click Configure.
-
Click Save.
-
Click Configure under Call Event Configuration to set the API for the campaign selected in Step 9.
-
Select the same campaign from the drop-down menu.
-
Click the event for which you want to push data into the CRM.
-
Enter the API URL and click Configure.
-
Scroll to the bottom of the page and click Configure API.
Once configured, data for the selected event is automatically pushed to your CRM's API every time the dialer is accessed from within the CRM.
Updated about 16 hours ago