
Broadcast Campaign
Add Broadcast Campaign
- To add a broadcast campaign, follow the below steps:
- Click on the Services tab on the side navigation.
- Click Outbound Services and select Manage Campaigns.
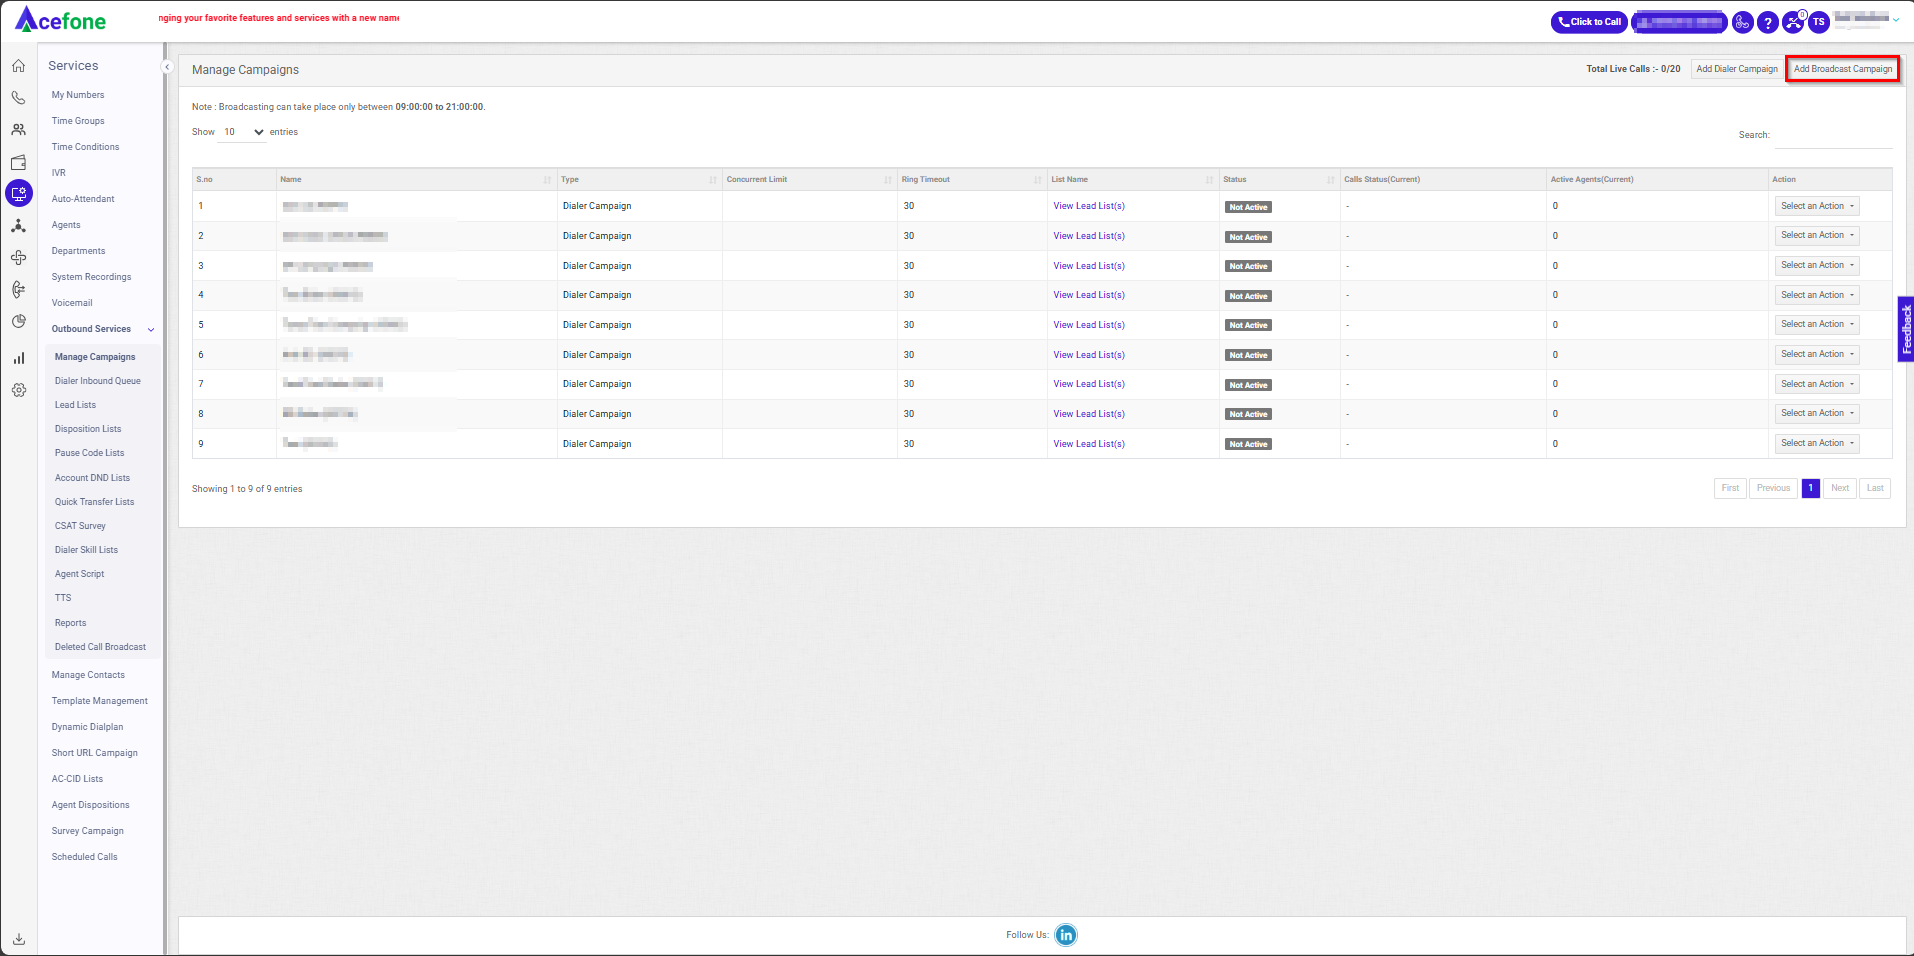
- A list of all the campaigns appears along with the relevant details.
- Click on Add Broadcast Campaign.
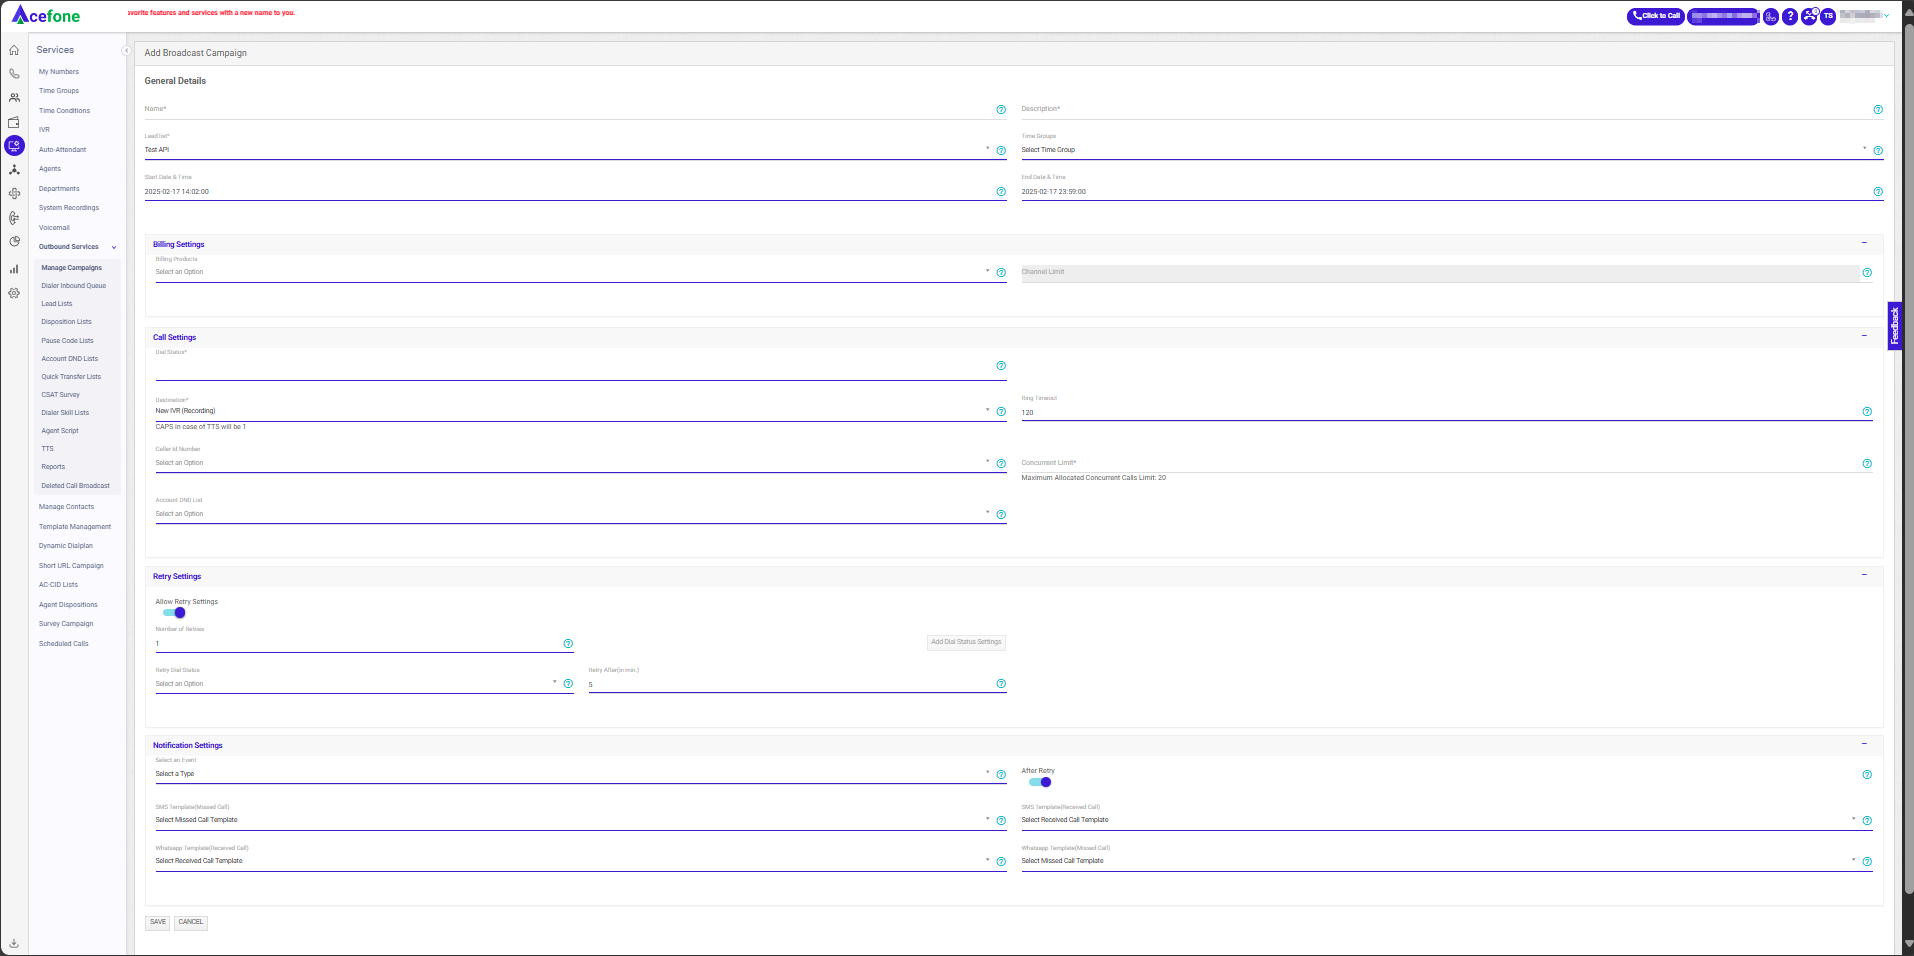
- The following screen will appear, prompting you to complete the necessary fields as shown in the screenshot below.
- General Details
| Field | Description | Options/Example |
|---|---|---|
| Name | Name of the campaign. | Example: "Summer Sale Campaign" |
| Description | Details of the campaign. | Example: "Promotional campaign for summer sale." |
| Lead List | Choose the list for which the campaign needs to be run. | Example: "New Leads", "Hot Leads" |
| Time Group | Choose the time group for which the campaign will be active. | Example: "Morning", "Evening" |
| Start Date and Time | Enter the start date and time for the call broadcast. | Example: "2025-01-10 09:00 AM" |
| End Date and Time | Enter the end date and time for the call broadcast. | Example: "2025-01-10 06:00 PM" |
- Billing Settings
| Field | Description | Options/Example |
|---|---|---|
| Billing Package | Select the billing package applicable for the campaign. | Example: "Standard Plan", "Enterprise Plan" |
| Channel Limit | Defines the number of channels allocated for this campaign. | Example: "10", "20" |
- Call Settings
| Field | Description | Options/Example |
|---|---|---|
| Dial Status | Choose the lead status from the lead list for the leads that will be contacted through the Broadcast Campaign. | Example: "New" |
| Destination | Choose the destination from the dropdown menu, e.g., choose an auto-attendant to greet callers or a thank-you message system recording (IVR). | Example: "Auto-Attendant", "IVR" |
| Ring Timeout | Enter the number of seconds for which the call will ring before being considered unanswered or disconnected. (Max 30 seconds as per TRAI regulations). | Example: "30 seconds", "45 seconds" |
| Caller ID Number | Choose the caller ID number that will be displayed at the receiver's end. | Example: "+918069651100" |
| Concurrent Limit | Enter the maximum number of calls that can be made at a specific point in time. | Example: "2" |
| Account DND List | Select the account DND list for the campaign. | Example: "10 minutes", "30 minutes" |
- Retry Settings
| Field | Description | Options/Example |
|---|---|---|
| Allow Retry Settings | Enables retry attempts for unanswered or failed calls. | Example: "Enable", "Disable" |
| Number of Retries | Defines how many retry attempts should be made. | Example: "3", "5" |
| Retry Dial Status | Specify the status of leads to which calls will be made again. | Example: "Not Qualified", "Follow Up" |
| Retry After (min.) | Time in minutes after which the system will retry an unanswered call. | Example: "10", "30" |
- Notification Settings
| Field | Description | Options/Example |
|---|---|---|
| Select an Event | Choose an event for which a notification (SMS or WhatsApp) should be sent. | Example: "Missed Call", "Received Call" |
| After Retry | Switch the toggle if you want a message to be sent after retrying the event. | Example: "Enabled", "Disabled" |
| SMS Template (Missed Call) | Choose the SMS template to send for a missed call event. | Example: "Missed Call Alert" |
| SMS Template (Received Call) | Choose the SMS template to send for a received call event. | Example: "Thank You for Calling" |
| WhatsApp Template (Received Call) | Choose the WhatsApp template to send for a received call event. | Example: "Thank You Message (WhatsApp)" |
| WhatsApp Template (Missed Call) | Choose the WhatsApp template to send for a missed call event. | Example: "Missed Call Notification" |
- Click Save.
- To edit/delete a campaign, click on Select an Action and click Edit or Delete.
- To start a Broadcast Campaign, click on Select an Action against it and hit Start Broadcast.
- The status will be changed from Not Active to Active.
- To view the call broadcast detail of a selected campaign, click on Select an Action and click Call Broadcast Detail.
Updated 11 days ago